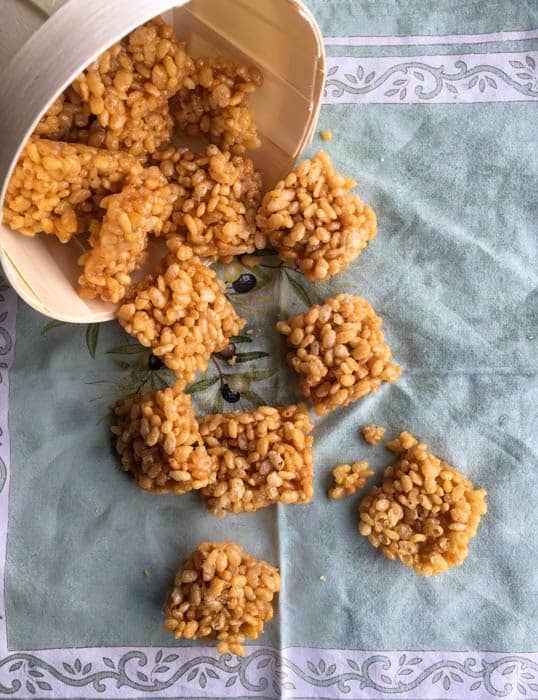
It’s not a party if there’s no honeycrunch!
When I was growing up in the seventies in New Zealand, Rice Krispies seemed to be one foodstuff that every family had in their kitchen. Whenever a kid had a birthday party, along with little red “cheerio” sausages on sticks and Bluebird chips, there would always be a Rice Krispie offering on the table in the form of honeycrunch bars or chocolate crackles . They fulfilled every desire of the parent and children at that time. For the parents, they were cheap, quick to make, and could easily be whipped up in large quantities. For the kids, they were sweet, sweet, sweet; which is all a small child needs from a party really. The hyperactive sugar rush they get from these treats can power them through hours of running around madly and shrieking excitedly. Kids who are served carrot sticks and hummus at parties don’t realize what they’re missing!
A very forgiving recipe
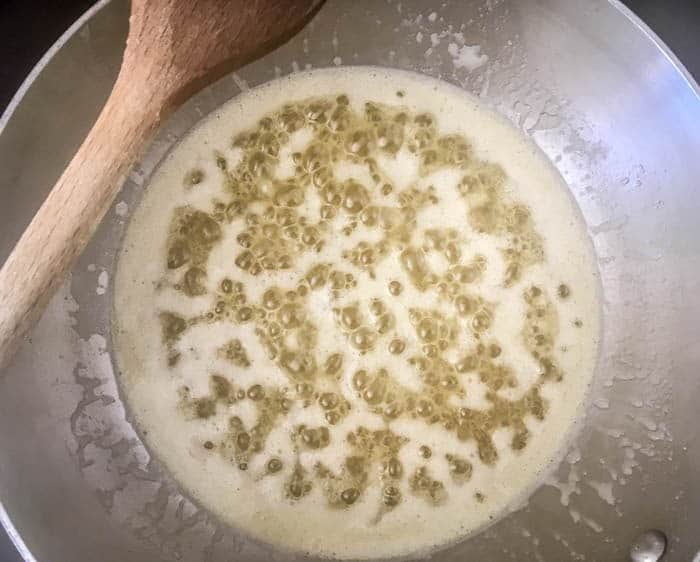
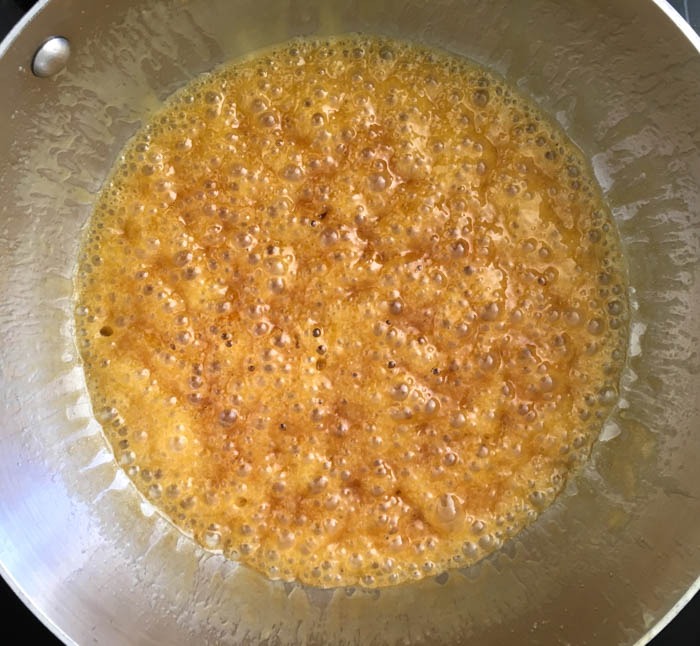
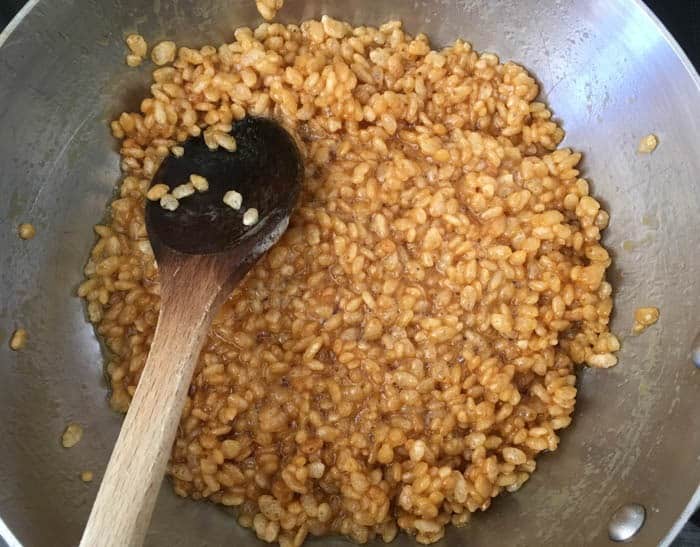
Aside from the non-politically-correct sugar rush honeycrunch gives, they are fun to make with kids as there is not much to making it. The recipe is very forgiving. The butter, sugar, and honey mixture should theoretically be boiled until it it changes to an amber colour as you see in the photos below. If you don’t boil it for long enough, the taste will be a little less caramel-like, and the honeycrunch bars will be a little softer rather than crunchier. No matter how they come out, they will taste good.
The one thing not to do when making honeycrunch
The only thing you should not do is boil the mixture for too long, as it can get a burnt taste, which is the one time when honeycrunch doesn’t actually taste very nice. Oh, there’s one other thing that you should not do: do not eat it all at once, otherwise you’ll turn into an over-excited 5 year old at a birthday party.
And honeycrunch is not just a party food
Actually, it’s not true that we only ate it at parties. My mother made it often so that it could be popped into our school lunch-boxes as a treat after we’d finished our Marmite sandwiches. It’s amazing how many kids suddenly want to be your friend when you pull a couple of bars of home-made honeycrunch out of your lunchbox!
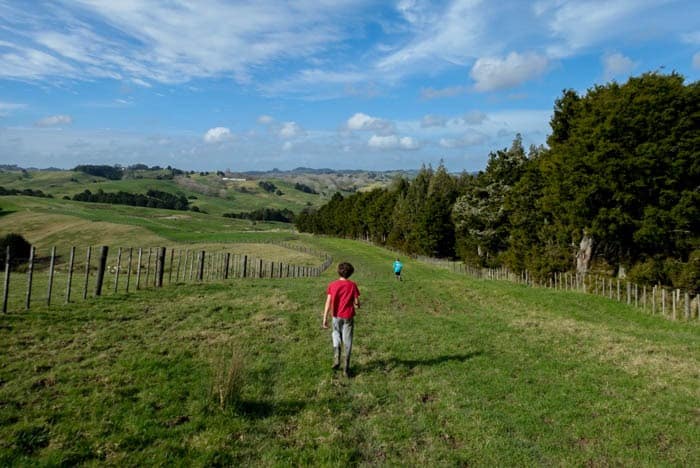
Travel photo of the week
This photo is taken on my father’s farm in New Zealand. The trees on the right are the beginning of a large area of preserved forest (or “bush” as it’s called in NZ). Dad has put up fences all around it to stop cattle and sheep from straying in there, in order to keep it as pristine as possible. It’s so dense that we were forbidden completely from setting foot in it. When I was little I imagined that witches and goblins had houses hiding in these trees. In fact, Dad got lost in there himself many years ago. He ordered his dogs to “Go home” so that he could follow them, and they just slunk around behind him and stayed at his heels. Mum had all the neighbours out searching for him to no avail, but he found his way out after a night of stumbling around. Take that as a cautionary tale: the New Zealand bush is VERY easy to become lost in. Even people like my Dad, who have a good idea of what they’re doing can lose their way very quickly!

Honeycrunch from New Zealand
Ingredients
- 100 g Rice Krispies 4 cups
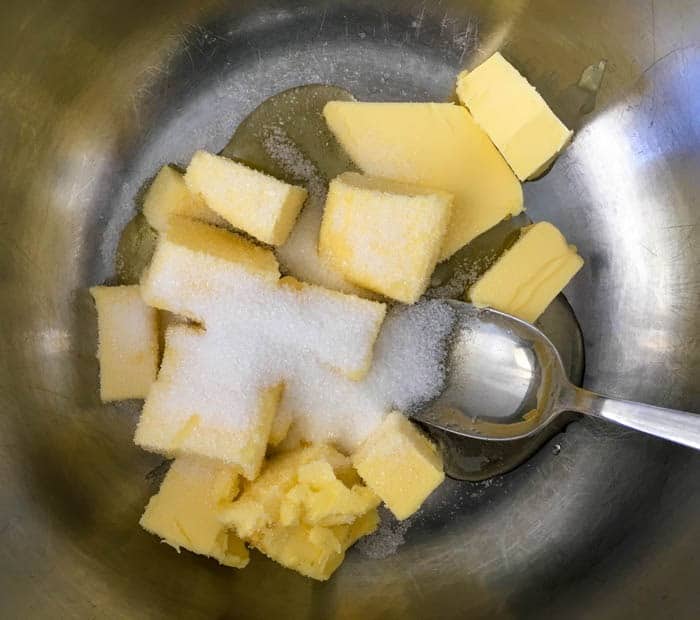
- 100 g Butter 1/2 cup
- 85 g honey 4 Tbsp
- 50 g sugar 4 Tbsp
Instructions
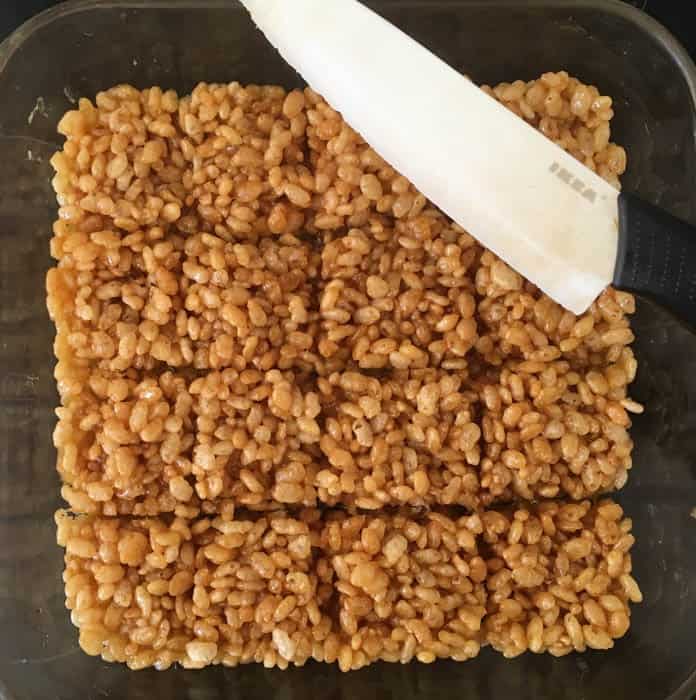
- Grease a baking tin with sides. I used a 20 x 20 cm tin for this recipe. (That's 8 in x 8 in)
- Heat the butter, sugar, and honey in a medium-sized pot on a medium heat. Let the mixture boil gently, and stir frequently for 5 minutes, until the colour begins to darken slightly.
- Take off the heat and stir in the Rice Krispies.
- Scrape into the prepared tin. Gently spread the mixture out with a spatula or spoon. Do not press down hard.
- Cut into slices while still warm. Leave to set for at least one hour.
By Lisa Watson