
Home-made bread-sticks are so much tastier than store-bought ones!
So, I know you’re going to say, “But, why make grissini (bread sticks) when I can buy perfectly good ones at the supermarket?”……why, indeed…..well, fresh homemade grissini are infinitely more delicious than store-bought, and anyway, it’s coming into Winter and on one of those rainy (or snowy, depending where you live) Sundays when you’ve got nothing much to do, this is a great way to spend some time. It’s a fun bread project for kids too as it’s fast – well, in terms of general bread-making, it’s fast. The time it takes to make grissini as opposed to normal bread is like comparing the speed of a turtle with the speed of a snail. It’s all relative. You see the snail inching along and you’ll say, “Boy, look at that speedy turtle!”

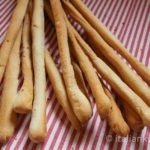
Watch out after taking the bread-sticks out of the oven; they disappear!
Homemade grissini get even better the next day, or so I’m told. There never seem to be any left the day after they’re made. You’ll see when you make these that they magically disappear as soon as you turn your back. When you turn around again, all you see are a few crumbs littering the ground, and maybe, if you’re very lucky, a glimpse of the back of someone’s foot as they’re hoofing it out of the kitchen after stealing the breadsticks that they weren’t allowed to have yet as it was nearly time for lunch…..yes, I’m talking to you, you two boys who tornado our house on a regular basis! Yes, I know that “tornado” is not a verb, but it’s a good description of what happens to a room when my kids are left to play in it for 10 minutes.

The history of the humble bread-stick
It is controversially said that grissini were first invented just north of my adopted city of Torino in the 1600’s, but others vow that they were first developed in the 1400’s. As nobody is still alive today from either of those centuries, we will never know for sure, but we can say for sure that they have been eaten in Northern Italy for a very, very long time. A recipe that old has to be a good one, right?!! In pretty much any restaurant you walk into in Italy (well in Turin at least: I can’t vouch for the whole of Italy), there are always grissini on the table, and we always say, “We’d better not eat too many or else we won’t be able to eat (make that scoff) everything else”, but then we do always eat too many as they’re so crunchy and yummy.

Ideas for making the bread-sticks your own
When you make grissini at home, you can personalize them to your taste: you can add cut up olives to the dough, or you can roll them in seeds, like poppy seeds or sesame seeds. Just a note though, as you can see from the photo below, I very gently rolled my bread-sticks in sesame seeds before baking them, but when they came out of the oven, all the seeds had fallen off. I think you need to roll them more assertively to make them stay on. If anyone has success with this, please let me know. In the end, they tasted great anyway, so it didn’t matter.

Just one more hint before you get to read (and hopefully try) the recipe. You cannot “un-stretch” the dough once it’s stretched out, or roll it up in a ball and start again. The grissini just won’t work. So….be careful! Try not to be too strong!
By Lisa Watson
Home-made bread-sticks (Italian grissini)
Ingredients
- 8 g Active dry yeast 2 1/4 tsp
- 2 Tbsp Flour
- 50 ml Water 4 Tbsp
- 1 tsp Sugar
- 500 g Flour 4 cups
- 230 ml Tepid water 1 cup
- 8 g Salt 1 1/2 tsp
- 50 ml Olive oil 3 Tbsp
Instructions
- I used a standing mixture to make the dough, but it can also be done by hand.
The first step:
- Mix together the yeast, 2 Tbsp flour, 50ml tepid water and 1 tsp sugar in a small bowl and leave for 20 minutes.
And then:
- Dissolve the salt in the second lot of water.
- Put the flour in the mixer bowl, then add the water and yeast mixture. Start to mix them together using the dough hook (or your hands!).
- While the mixer is running, add the oil in a steady stream.
- Knead the dough for 7 – 10 minutes until it is elastic.
- Turn out onto a lightly floured bench. Flatten it with your hands to form a large rectangle (Don’t pull at the dough too hard otherwise it will rip).
- Brush the top with olive oil and sprinkle with flour.
- Cover with plastic wrap and a teatowel, then leave it to rise for about an hour until it has doubled in bulk.
- Heat the oven to 200 C (400 F).
- Cut off strips of the dough and gently stretch them out to make the length of grissino that you desire. If they break, don’t try to stick them back together (it won’t work!).
- At this point you can leave them as they are or roll them in sesame seeds or poppy seeds if you like.
- Lay them on a tray covered with baking paper.
- Bake for 15 -18 minutes, turning them over halfway through the cooking.
- I dare you not to eat them immediately once they come out of the oven! The bread smell swirling through the air is overwhelmingly good!