
Discovering the focaccia success secret
I had the pleasure of watching Leonarda, a friend of mine from Puglia, make focaccia last week. I had tried over the years to make focaccia but for some reason, no matter what I tried, the focaccia always came out hard like a plank of wood. Leonarda very kindly told me that there must be something wrong with me as it was so easy to make, and then actually showed me just how easy it really IS to make! I don’t know what I was doing wrong before, but now I’m churning out the sort of focaccia that makes my kids ask me to cook more of it while they’re eating the focaccia I just took out of the oven. Now, that’s a great measure of success!

Making focaccia by eye with an Italian pro
So, I’ve discovered that focaccia is actually very easy to make, and very forgiving of mistakes as well. Leonarda showed me that she makes it by eye. I got her to weigh things as she was going so that I could write it up for you, which she did, but as she said, if you know the consistency of the dough you need at the end, you can just add a little more flour or water to get it that way. With practice, I hope I can do that! I’ve taken a lot of photos for you so that you can see the focaccia at each stage in the recipe.
Making focaccia is less time-consuming than it seems
The fabulous thing about making focaccia is that you don’t have to do it all in the same day. You can make the initial dough in the afternoon, then throw it in the fridge for the night, or you can start in the morning and leave it rising on the bench for about 5 hours until you get to the next step. The recipe I’ve written out for you below is the one with the overnight rising. This works great for me as it means that we can have focaccia with lunch with no problem…I’m certainly not getting up at 2 in the morning just so we can have it at midday. I like to cook, but not that much!
What to use as toppings
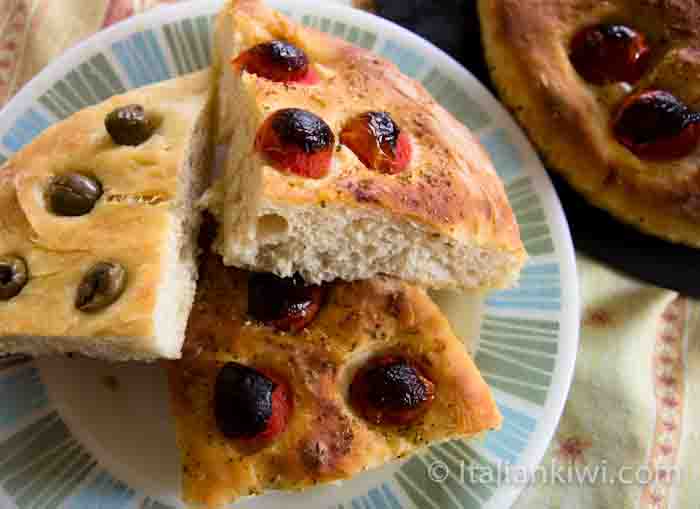
There is only one downside to focaccia: it really needs to be eaten on the day it’s made. It goes stale quickly. Even by the next day, it’s not that good. I haven’t had a problem with this yet. It seems to disappear just about before it gets to the table! Your imagination is the only limit to what you put on top. You can also make it with nothing on top: just olive oil and a little salt. Here, I used cherry tomatoes and oregano on one, and green olives on the other. I’ve eaten delicious ones with various toppings such as caramelized onions, black olives, slices of tomato, and also ones with cheese in the middle. Just don’t overload the focaccia: one or two sprinklings of a topping is plenty.
And the last word on focaccia
If you don’t have a standing mixer, you can do this easily by hand, as it doesn’t need much kneading, so don’t let that stop you!
Thanks to Leonarda for showing me the true focaccia path. Time to go and make one….my stomach is growling just looking at these photos. Try it yourself! I’d love to here how it goes!
For a stuffed focaccia from Liguria in Italy, try out this recipe here
By Lisa Watson

Leonarda’s Focaccia
Ingredients
- 500 g Flour
- 6 g dehydrated Yeast
- 20 g Potato Flakes
- 300 ml Water
- 10 g Salt 2 tsp
- 250 g Cherry tomatoes optional
- 2 – 3 tsp Oregano optional
- 100 g Olives optional
Instructions
Day 1
- Put the yeast, potato flakes and flour into the bowl of your standing mixture.
- Add the water and the salt.
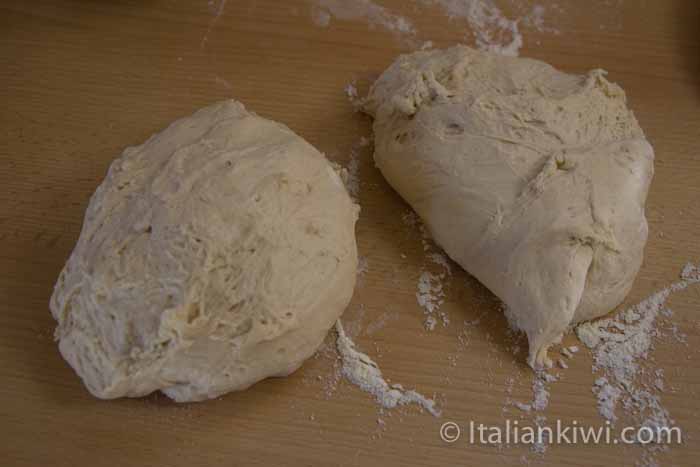
- Knead for 5 minutes until the dough comes together. Add a little more water, 1 tablespoon at a time, if the dough seems dry and doesn’t stick together well.
- Put the dough in a clean bowl lightly oiled with olive oil and cover the bowl with a lid or transparent film.
- Put in the fridge overnight.
Day 2
- Take the dough out of the fridge and leave on the bench for an hour to warm up.
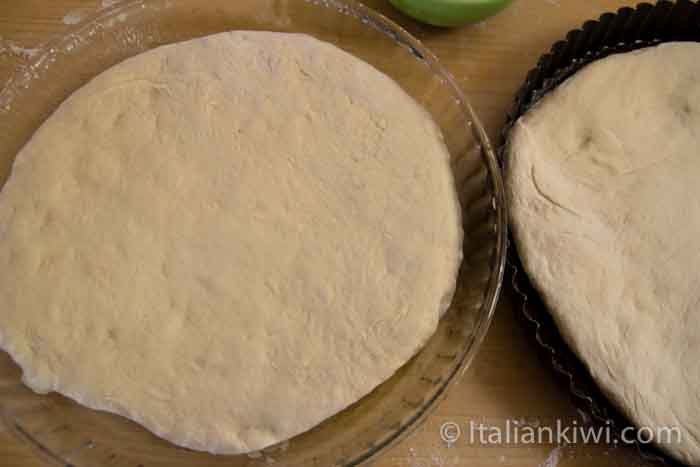
- Oil two oven dishes with olive oil, or one cookie tray with This time, I used pie pans that were 25 cm in diametre, but you can make them square or rectangle, depending what you have in your cupboard.
- Cut the dough into two roughly equal portions. (Or leave in 1 piece for the cookie-tray)
- Gently push the dough with your fingers out into the shape you want it, turning it over every now and then. It should be about 1 – 1 1/2 cm ( about 1/2 an inch) high when you have finished.
- Put it in the pan you are using.
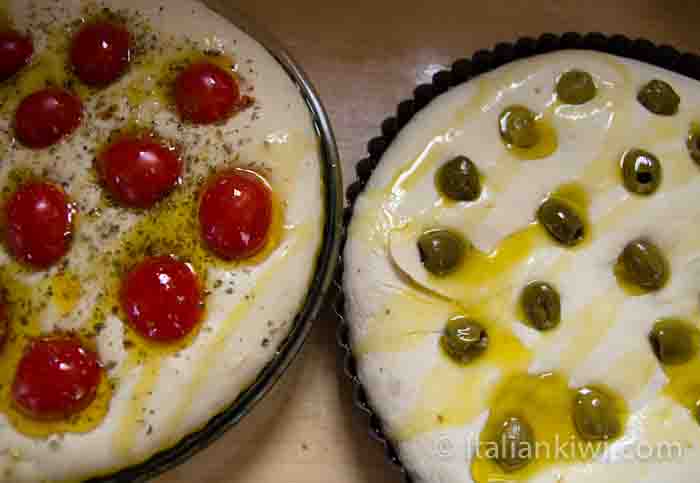
- Cut the cherry tomatoes in half and press gently them lightly into the dough at regular intervals. Sprinkle with oregano. Do the same for olives if you are using those, without the oregano.
- Cover with a teatowel and leave on the kitchen bench to rise for 2 – 3 hours until puffy.
- Heat the oven to 200°C (400°F).
- Sprinkle the focaccia with a few tablespoons of olive oil and splash with a 2 – 3 tsp water water (this helps a nice crust to form).
- Bake for about 20 -25 minutes, until the top is golden-brown and the tomatoes are slightly charred.